
A request for a five-panel cap can leave two people picturing different products. One may expect a shallow camper shape; another may be thinking about the front layout of a taller cap. A useful design brief closes that gap before a sample is made. It shows the panel arrangement, silhouette and features that matter to the collection.
When approaching a 5-panel cap manufacturer, send a small set of annotated references rather than a folder of unrelated inspiration. Use the 5-Panel Cap Buying Guide for the broader buying process. This article focuses on the construction decisions that belong in the first brief.
Describe the pattern with more than a panel count
Start with front, side, top and rear views of the intended shape. Mark the seams and identify the proportions of the front, side and top areas. If the cap in a reference photograph needs changes, put those comments beside that view: retain the low crown, change the rear fastening, or revise the visor outline.
Keep a reference number on each image. A supplier should be able to distinguish a shape reference from a logo example without guessing which details to copy. If you combine features from several caps, a simple marked drawing helps show the proposed result.
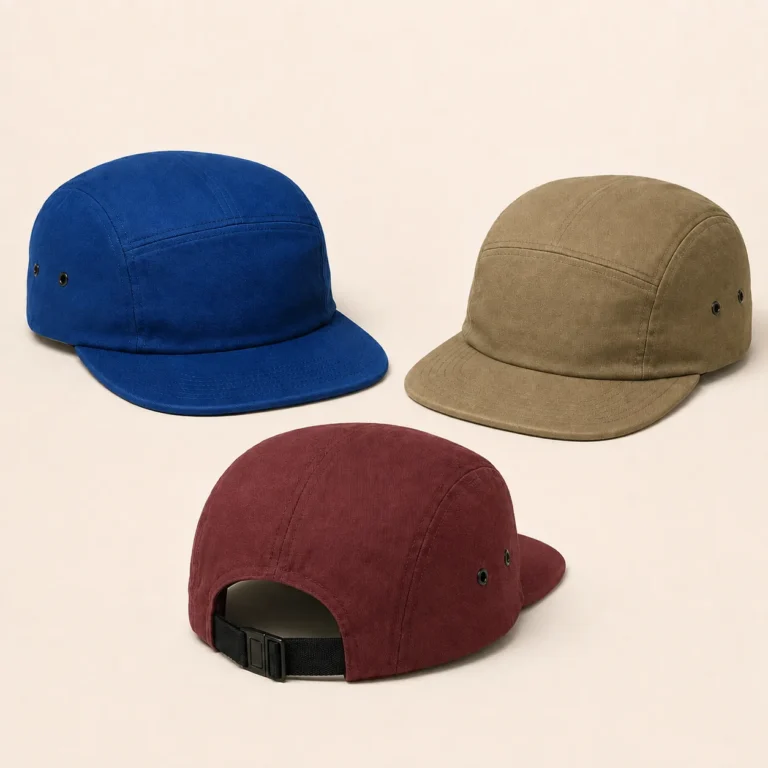
Separate the silhouette from the inside support
A photograph shows the visible crown, but it may not explain what supports it. Record the desired profile and ask the supplier to identify the proposed lining, front support and internal components. Review those choices together with the outer fabric.
For an industry example, AS Colour describes its Class Five Panel Cap with a mid profile, flat peak and internal mesh structure support. That combination belongs to that particular product. It illustrates why “five-panel” still needs supporting construction details in your own brief.
Show the cap in the condition you intend to approve
Agree whether the main silhouette review will use a worn cap, a display form or another repeatable setup. Include comparable front and side views. A visor reshaped for a photograph should not quietly become the reference for how the product must arrive in its pack.
Add dimensions with units and a measurement method where they are needed. Crown depth, the rear opening and the closure setting can all be relevant to fit review. Ask the supplier to explain how those points will be checked on the assembled sample.
Give each component a clear job in the brief
Describe what you want the fabric, visor and closure to contribute to the design. A visible texture reference communicates one part of the idea; a swatch and component reference make the proposal more specific. If a fabric or buckle is still under review, label it as provisional.
| Decision | Reference to supply |
|---|---|
| Panel layout | Marked views or drawing with the intended seam positions |
| Crown and fit | Profile, wearing setup and relevant measurements |
| Fabric and support | Swatch identity and proposed inside components |
| Visor and closure | Shape, supplied curve, fastening and strap arrangement |
| Branding | Artwork revision, dimensions, method and marked position |
Check logo space on the chosen front layout
Place the artwork on the selected pattern at its proposed finished size. Mark its position from identifiable seams or edges. Do not assume that a wide graphic shown on one cap will fit another cap with the same panel count.
The first decorated sample should answer placement questions as well as showing the artwork. Review its scale when the cap is worn, its relationship to the visor and any nearby seams. If the application or supporting material changes, identify which parts of the approval need to be revisited.
Keep shared details and colorway differences visible
For a small range, establish the common construction first. Then list the differences by item: panel colors, contrasting visor, closure finish, logo or inside label. Give each variation an identifier that can follow it through sample comments and quotation.
For example, two colorways might share one crown and visor but use different front graphics. A third might add a contrast top panel. Put those differences in the item list instead of relying on a general comment such as “same as the other cap.”
End the brief with the questions the first sample must answer
Prioritize the unresolved decisions. If the purpose of the first sample is to compare crown proportions, say so and identify temporary components. Record which details are accepted after review and which need another round. That gives the next sample a clear purpose.
For a Wenext project, send the marked references, proposed items and quantity breakdown through the custom 5-panel cap product page. Use Contact Wenext Caps to include the intended destination, development questions and timing. The supplier can then review a defined construction brief and identify the inputs still needed.