
Sun Visor Buying Guide
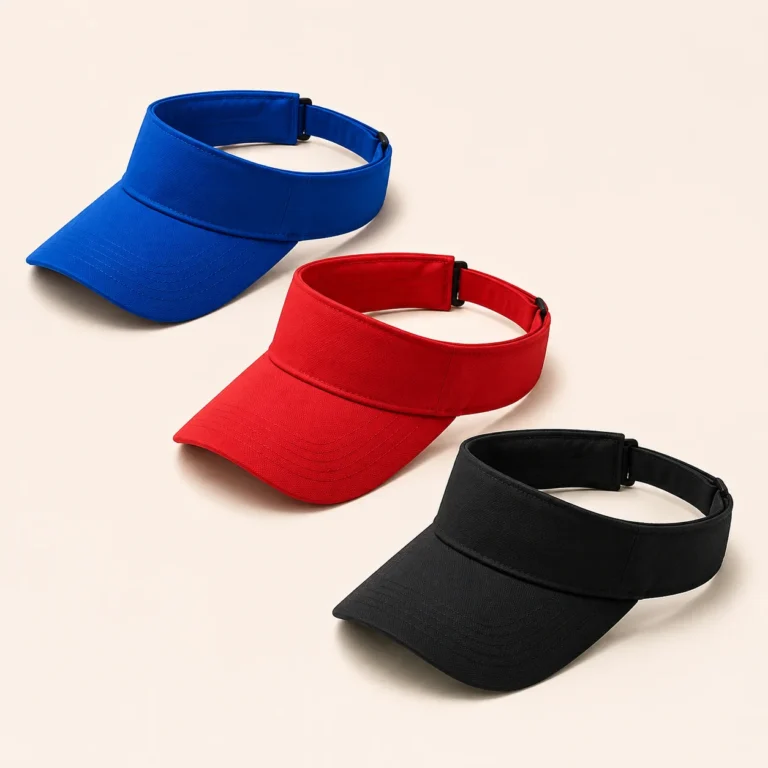
A sun visor has an open crown, a band around the head and a front brim. Its fit depends on how that band, fastening and brim work together. Start the brief with the intended wearing position and shape, then add materials, decoration and packing details.
Use the Wenext Caps sun visor product page for a project discussion. This sun visor buying guide helps turn a reference image into a specification that can be sampled and reviewed.
Define the open-crown construction
Show the front band, side taper, rear arrangement and inside finish. Identify the band height and intended position around the head. Include a side view to show how the brim projects from the front.
Keep this construction distinct from a full-crown cap with a flat or curved visor. In that cap description, “visor” names the front brim; an open-crown sun visor is a different complete product. Use marked views to make the intended item clear.
Review the band and closure as one fit system
Specify the proposed size system and rear fastening. Record the relevant measurements, units and method, including the settings to be reviewed. Identify the intended wearer or fitting reference and keep the wearing position consistent between sample rounds.
Check the band at the front, sides and rear. Review the closure handling and any strap end or overlap at the required settings. Where the visor will be worn with particular eyewear or other equipment, include that combination in the fitting review.
Specify the brim beyond “curved”
Identify its outline, projection, width, curve and underside. Show the relevant stitching and edge finish. Review the band-to-brim join from the front and side, including how the brim sits when the visor is worn in the intended position.
An official product example illustrates why those details should be named. Titleist’s Tour Performance Visor lists a standard curve bill and an adjustable fastening. Use your own selected brim and closure references to define the combination proposed for a Wenext project.
Identify shell, sweatband and support separately
List the proposed outer material, inside sweatband, reinforcement and fastening components. Keep their references connected to the sample. Review the inside surface and the finished edges alongside the outside appearance.
If the project includes a specific material or performance requirement, identify the property and applicable evidence for the proposed component or finished item. Keep the accepted information with the relevant material version. A general sports or outdoor product name leaves that evidence decision open.
Make the available branding area visible
Place the artwork at its proposed finished dimensions on the front-band layout. Identify its position against the band edges and brim join. Show any side or rear marks separately, with their own method and dimensions.
For embroidery, review the application on the actual band construction. Discuss fabric and support with the decorator; Madeira’s backing guidance provides relevant technical background. Check the result on the complete visor, including the surrounding surface and inside finish where relevant.
Connect labels and packing to the item
Identify inside labels, exterior tabs, hangtags and retail identifiers required for the range. Review their positions where the band contacts the wearer or where a strap moves. Keep the approved files connected to the correct colour, size and artwork variation.
Agree the intended nesting or other packing arrangement. Review the brim, band and decoration after that handling under agreed conditions. Identify separate receiving or release groups in the quantity and carton breakdown.
Give the sample round a specific purpose
State whether the round is intended to settle the band pattern, wearer fit, brim shape, decoration or complete presentation. Mark temporary components before the review. Keep accepted features separate from changes still required.
- Fit: wearer reference, wearing position, band measurements and closure settings.
- Shape: front height, side taper, brim outline, projection and curve.
- Components: shell, support, sweatband and fastening references.
- Branding: artwork, dimensions, position, application and inside result.
- Presentation: labels, supplied shape and packing review.
Retain the complete approved combination and any condition awaiting confirmation. For a repeat order, identify the earlier version and review the effects of proposed material or component changes.
Build a quantity brief that can be quoted
List each complete colour, size, logo and packing variation with its quantity. Identify any shared body construction and differences requiring separate review. Send the destination and intended timing with that breakdown.
Ask the supplier to confirm minimums, included development work and timing against the actual specification. Record provisional inputs and update the proposal when an accepted change affects its scope.
Related planning resources
Design and fit
Branding and assortment planning
Quality and supplier comparison
Compare other headwear constructions
The Custom Bucket Hat Guide covers a complete crown with an all-around brim. The 6-Panel Cap Buying Guide covers a joined-panel crown and front visor. Compare the constructions using the intended fit and appearance.
Common sun visor buying questions
Does an adjustable strap define the whole fit range?
Review the band pattern, fastening, intended settings and wearer references together. Keep the accepted range connected to the complete sample and measurement method.
Can a cap logo be used unchanged on a visor?
Check the proposed dimensions and application against the visor’s available band area. Review the actual decorated sample before extending an artwork approval from a different construction.
What should I send for an initial enquiry?
Send marked front, side and rear views, band and brim details, fit system, materials, artwork, quantities and destination. Add target timing and open development questions through Contact Wenext Caps.